


 800 WHITES
How to Get Beeswax Out of Clothes: Tips from Whites® in Dubai and Abu Dhabi
28 Mar 2026
Overview
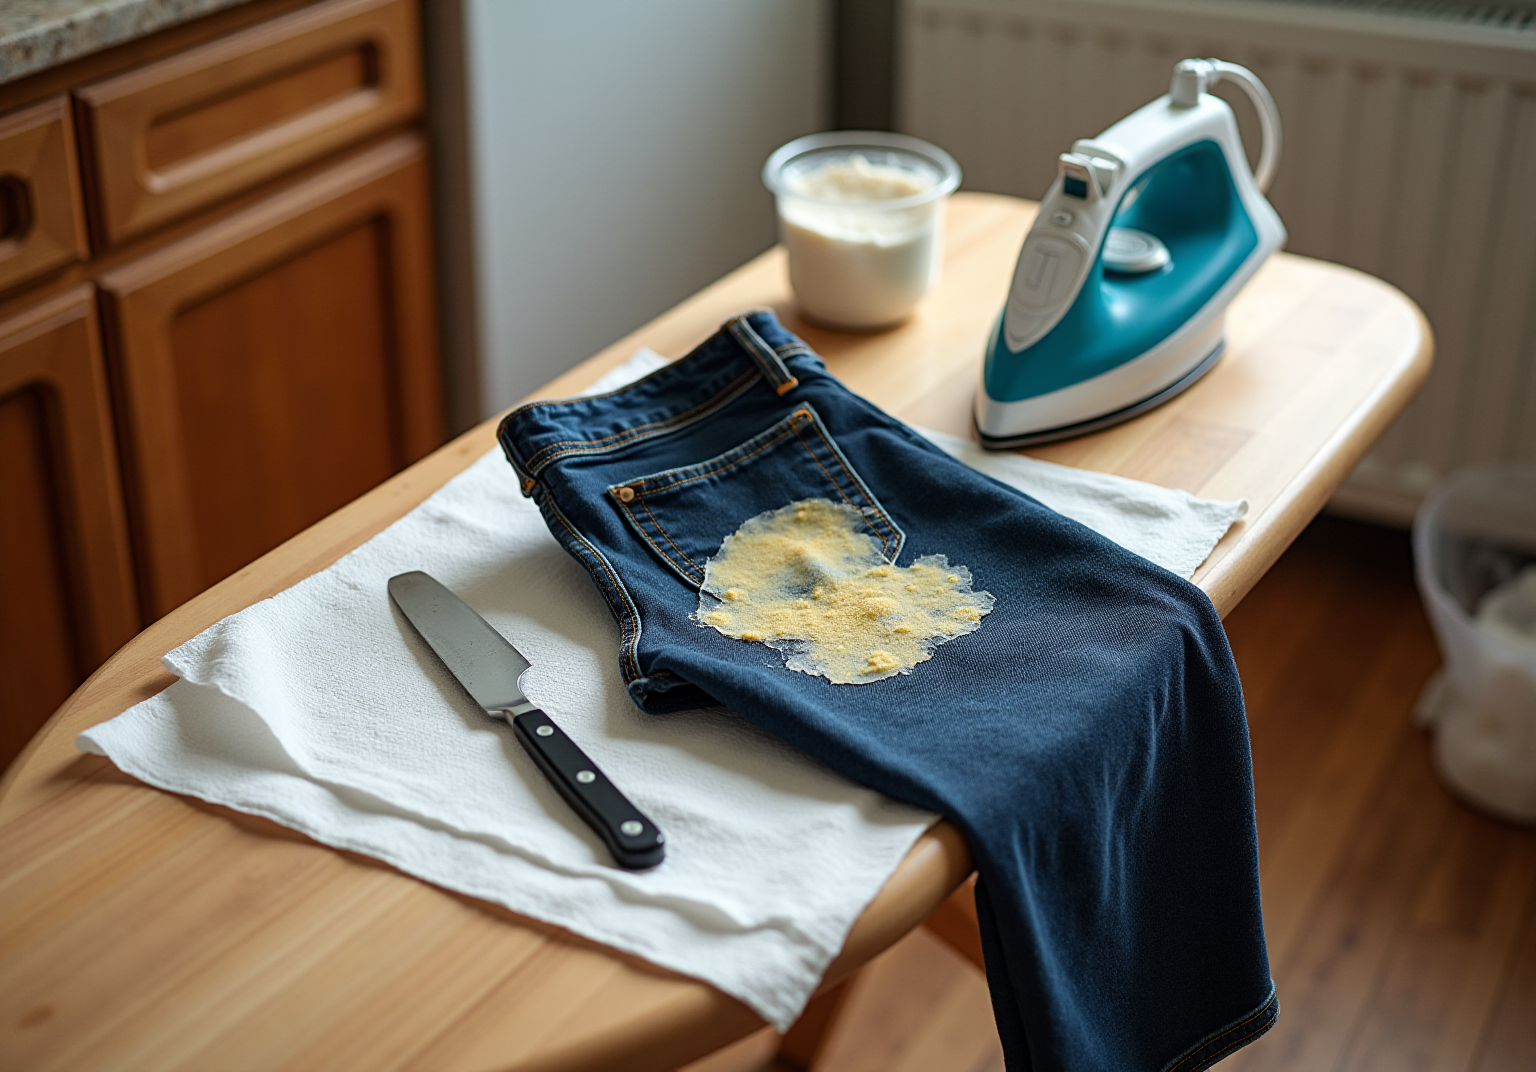
To effectively remove beeswax from clothes, it is essential to gather the necessary tools, including:
-
An iron
-
Paper towels
-
Cornstarch
Following a systematic process is crucial; this involves:
-
Hardening the wax
-
Scraping it off
-
Applying heat to absorb any remaining residue
The article provides detailed steps and troubleshooting tips to support this method, demonstrating that with the right preparation and technique, beeswax stains can be successfully eliminated without damaging the fabric.
Introduction
Removing beeswax from clothing presents a significant challenge, particularly due to the risk of permanent stains. Nevertheless, with the appropriate techniques and tools, it is entirely feasible to restore garments to their original condition. This guide outlines a systematic approach that simplifies the beeswax removal process while providing essential insights into effective fabric care. When faced with beeswax that stubbornly adheres to the fabric, defying all removal efforts, understanding the underlying challenges and potential solutions becomes crucial for achieving successful outcomes.
Gather Necessary Tools and Materials
To effectively learn how to , it is essential to gather the appropriate tools and materials. The following items are necessary for this task:
-
Iron: A standard household iron is crucial for melting the wax. Ensure it is heated to the 'cotton' setting before beginning the removal process.
-
Ironing Board: This provides a stable, flat surface for ironing. Place a sheet of paper on the ironing board before laying the fabric with beeswax on top.
-
or Brown Paper Bags: These materials will absorb the melted wax, preventing further staining.
-
Butter Knife or Dull Scraper: This tool is useful for gently scraping off any hardened wax before the melting stage.
-
Cornstarch or Talcum Powder: These powders can assist in absorbing any remaining wax residue after the initial removal.
-
Plastic Bag: This is for disposing of any waste materials produced during the cleaning process.
For example, a General Manager once spilled melted beeswax on her favorite jeans while demonstrating a filtration system. After freezing the jeans overnight and scraping off the wax, she successfully cleaned them with no signs of damage after a regular wash and dry. Having these items ready will streamline your efforts and ensure you can efficiently tackle.

2. Prepare the Fabric and Work Area
Before initiating the wax removal process, it is crucial to prepare your workspace effectively. A well-organized environment significantly enhances the likelihood of .
-
Choose a Suitable Location: Select a flat, stable surface, such as an ironing board or a clean table, to ensure a secure working area.
-
Lay the Garment Flat: Position the affected area of the material face up on the ironing board, ensuring it is smooth and free of wrinkles for optimal treatment.
-
Protect Surrounding Areas: Cover the surrounding areas with an old towel or cloth to catch any wax drips or spills, thereby preventing mess and damage.
- Check Care Labels: Always review the care instructions on the garment to confirm that the heat from the iron will not damage the material. Notably, 82% of consumers find useful for
garment maintenance
, underscoring their importance. Additionally, nearly two-thirds of respondents adhere to the instructions on labels, reinforcing the necessity of following these guidelines.
-
Test on an Inconspicuous Area: If uncertain about how the material will respond to heat, test the iron on a hidden area first to avoid any potential damage.
As emphasize, and fabric is essential for . For added effectiveness, consider using an iron and paper towels to absorb the melted wax, ensuring a thorough cleaning process.

3. Apply Effective Beeswax Removal Techniques
To effectively , follow these steps:
-
Let the Wax Harden: If the beeswax is still warm, allow it to cool and harden completely. This makes it easier to remove.
-
Scrape Off Excess Wax: Use a butter knife or dull scraper to gently lift off as much hardened wax as possible. Be cautious not to harm the material.
-
Apply Cornstarch or Talcum Powder: Sprinkle a generous amount of cornstarch or talcum powder over the wax stain. This will help absorb any remaining wax.
-
Heat the Iron: Set your iron to a low heat setting without steam. Place a clean paper towel or brown paper bag over the wax stain.
-
Iron Over the Stain: Gently press the iron onto the paper towel or bag, moving it slowly. The heat will melt the wax, which will be absorbed by the paper. As Hana Tadesse notes, "Using the right heat setting is crucial for effective wax removal."
-
Check and Repeat: Lift the paper to check if the wax has been absorbed. If necessary, repeat the process until no wax remains.
-
: Once the wax is removed, to eliminate any residue from the cornstarch or talcum powder.
These . For instance, a General Manager successfully removed a large wax spill from her jeans by freezing the fabric and , followed by a regular wash that restored the jeans to their original condition. The typical duration required to eliminate wax from clothing is about 30 minutes, making this method suitable for busy professionals. By following these steps, you can effectively learn without causing damage.

4. Troubleshoot Common Issues During Removal
When considering how to , several common challenges may arise. Here’s how to effectively troubleshoot them:
-
Wax Still Remains After Ironing: If some wax remains after the initial ironing, reapply cornstarch or talcum powder and repeat the ironing steps. Ensure the iron is set to the appropriate temperature to prevent further damage to the material.
-
Material Becomes Compromised: Should you notice any damage to the material, cease the cleaning process immediately. Assess the situation and consider , especially for delicate fabrics that require .
-
Stain from Cornstarch or Talcum Powder: If the powder leaves a residue, gently brush it off with a soft brush or cloth after washing the garment to restore its appearance.
-
: If the area feels sticky after removal, wash the garment with a heavy-duty detergent to effectively eliminate any lingering residue.
-
Color Fading: If you notice color fading during the process, it may result from heat exposure. Always conduct a test on a concealed section of the material first to avoid this issue.
It is important to recognize that can take up to three hours, so patience is essential. For instance, a General Manager successfully eliminated melted wax from her favorite jeans by freezing them overnight and scraping off the substance with a paring knife before washing. As a once stated, "The key to successful stain removal is understanding the fabric and the stain itself." By being aware of these potential challenges and understanding , you can facilitate a more efficient removal process.

Conclusion
In conclusion, successfully removing beeswax from clothing not only restores the fabric but also empowers individuals to maintain their favorite garments. By following a systematic approach and utilizing the right tools, anyone can effectively tackle this common stain without damaging their clothing. Preparation, appropriate materials, and methodical application of heat and absorption techniques are essential for success.
Gathering essential tools such as an iron, paper towels, and cornstarch is crucial, along with careful workspace preparation. Key techniques include:
-
Allowing the wax to harden
-
Scraping off excess
-
Using heat to melt the wax
Addressing common issues like sticky residues or color fading further ensures a thorough understanding of how to achieve optimal results.
By applying these methods and being mindful of potential challenges, individuals can confidently address beeswax stains and keep their clothing looking pristine. Embracing these best practices transforms a frustrating mishap into a successful cleaning experience, preserving both the quality and appearance of cherished items.
Preserve Your Wardrobe with Expert Care
Order now to ensure your favorite garments stay pristine and beautifully maintained.
Frequently Asked Questions
What tools and materials are needed to remove beeswax from clothes?
The necessary tools and materials include a standard household iron, an ironing board, clean paper towels or brown paper bags, a butter knife or dull scraper, cornstarch or talcum powder, and a plastic bag for disposal.
How should the iron be set for removing beeswax?
The iron should be heated to the 'cotton' setting before beginning the removal process.
What is the purpose of using clean paper towels or brown paper bags in this process?
Clean paper towels or brown paper bags are used to absorb the melted wax, preventing further staining on the fabric.
How can a butter knife or dull scraper be helpful in removing beeswax?
A butter knife or dull scraper is useful for gently scraping off any hardened wax before the melting stage.
What role do cornstarch or talcum powder play in the beeswax removal process?
Cornstarch or talcum powder can assist in absorbing any remaining wax residue after the initial removal.
Why is it important to have a plastic bag during the cleaning process?
A plastic bag is important for disposing of any waste materials produced during the cleaning process.
Can you provide an example of how someone successfully removed beeswax from clothing?
A General Manager once spilled melted beeswax on her favorite jeans. She froze the jeans overnight, scraped off the wax, and then successfully cleaned them with no signs of damage after a regular wash and dry.
